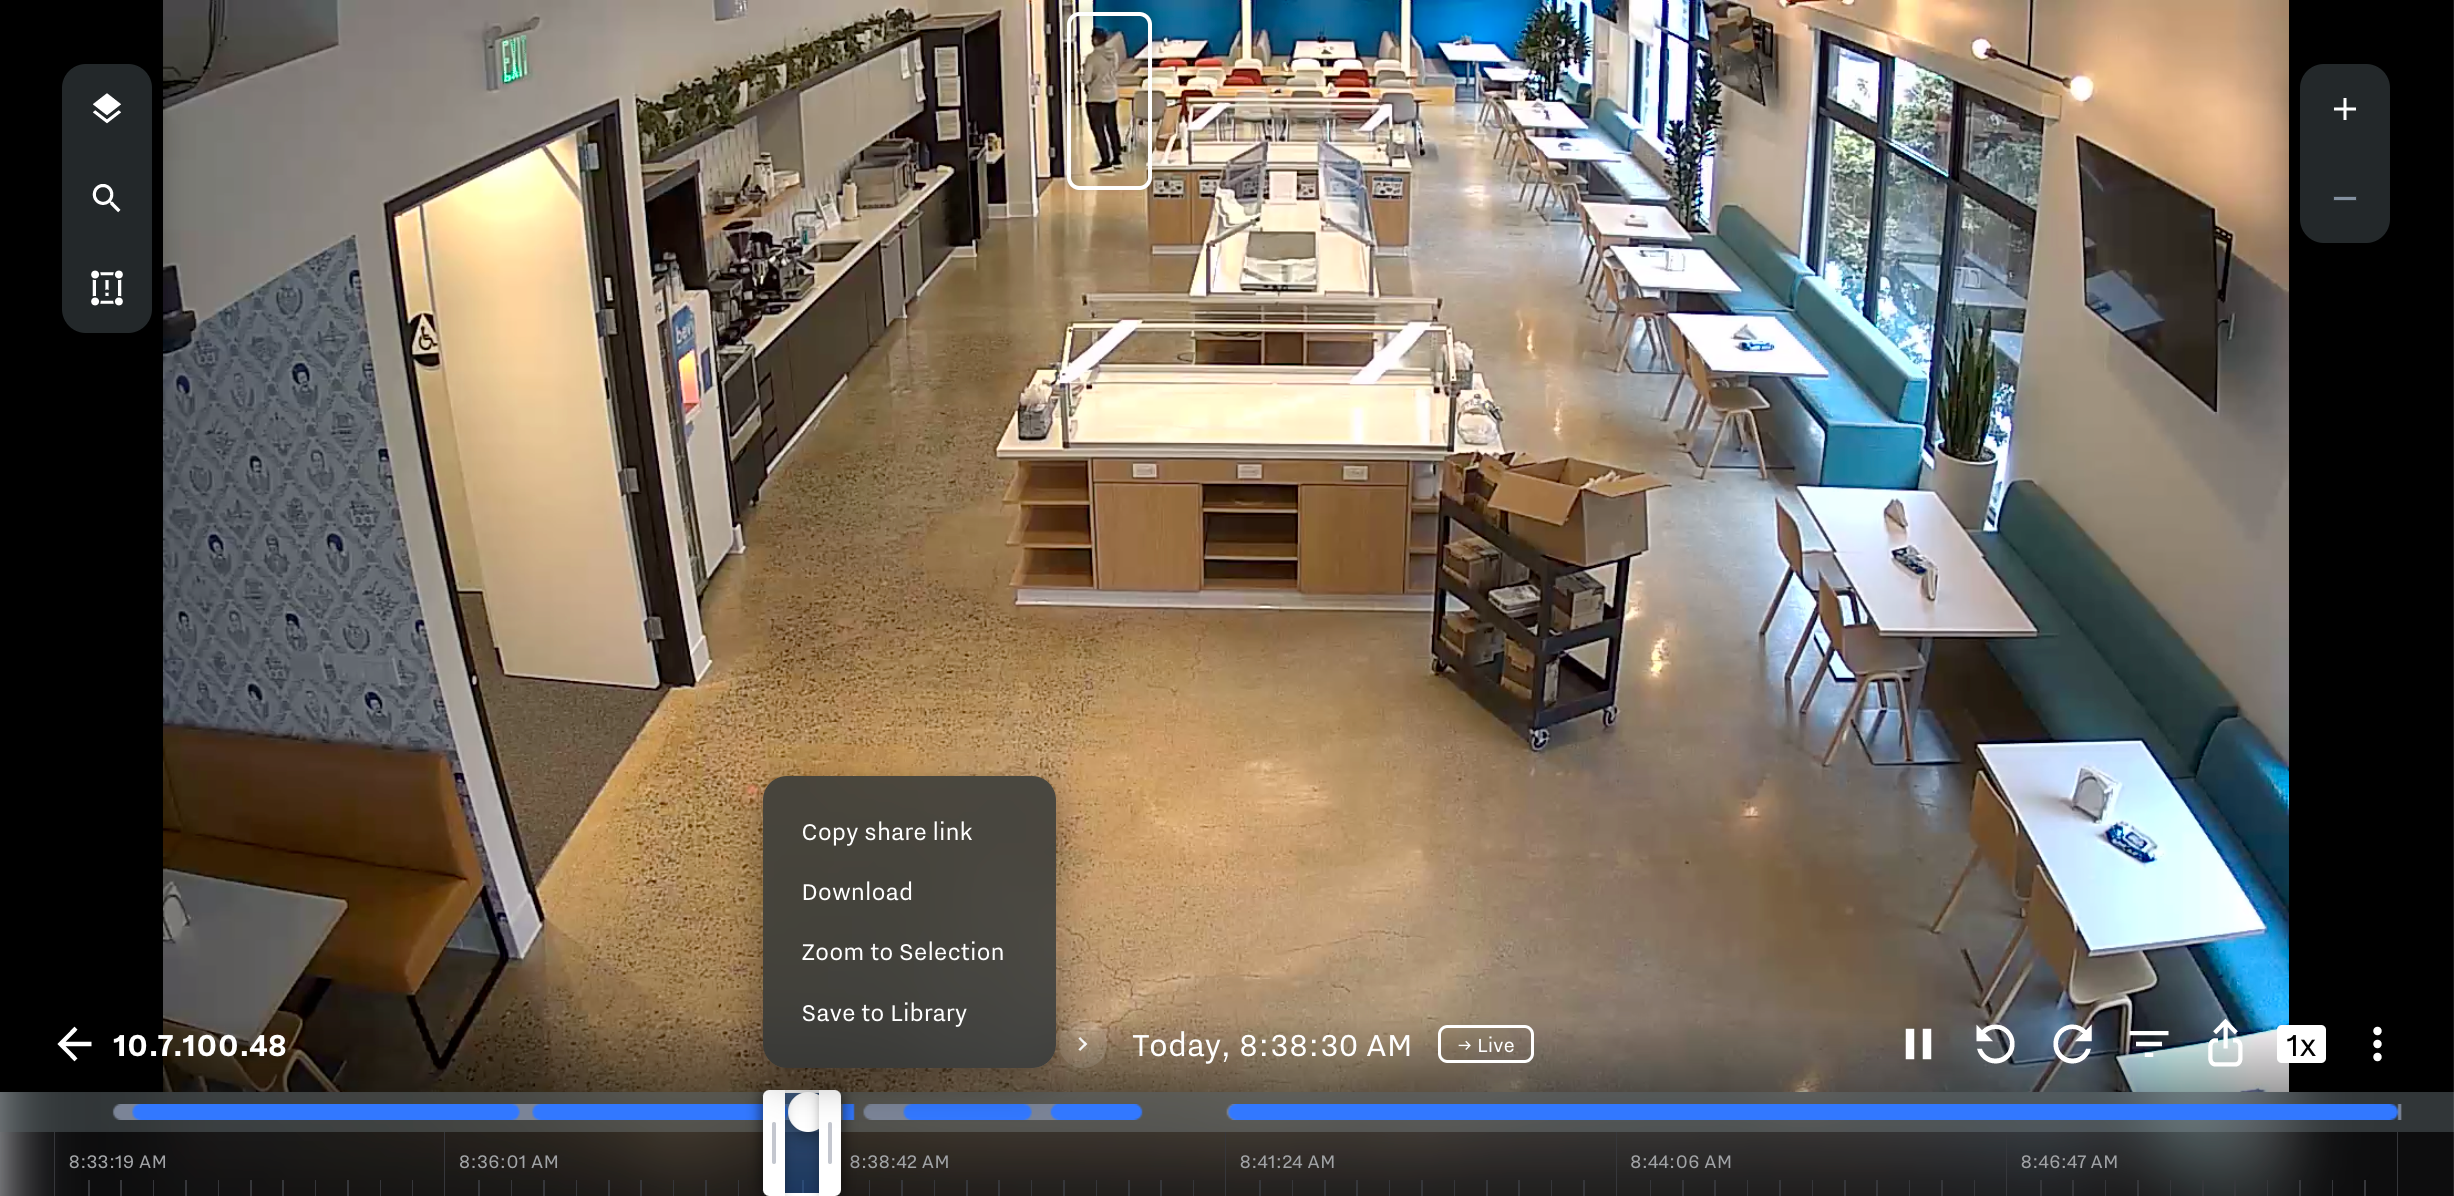
During footage review, you can save any portion of a video (less than 1 hour) to the video library for indefinite storage. To save the video clip, you select the portion you want to save in the stream timeline and select the option Save to Library. For more information, see Search Camera Footage for Activity.
Note
To view site cameras and access video footage, you must have a role that provides Site Cameras: View access.

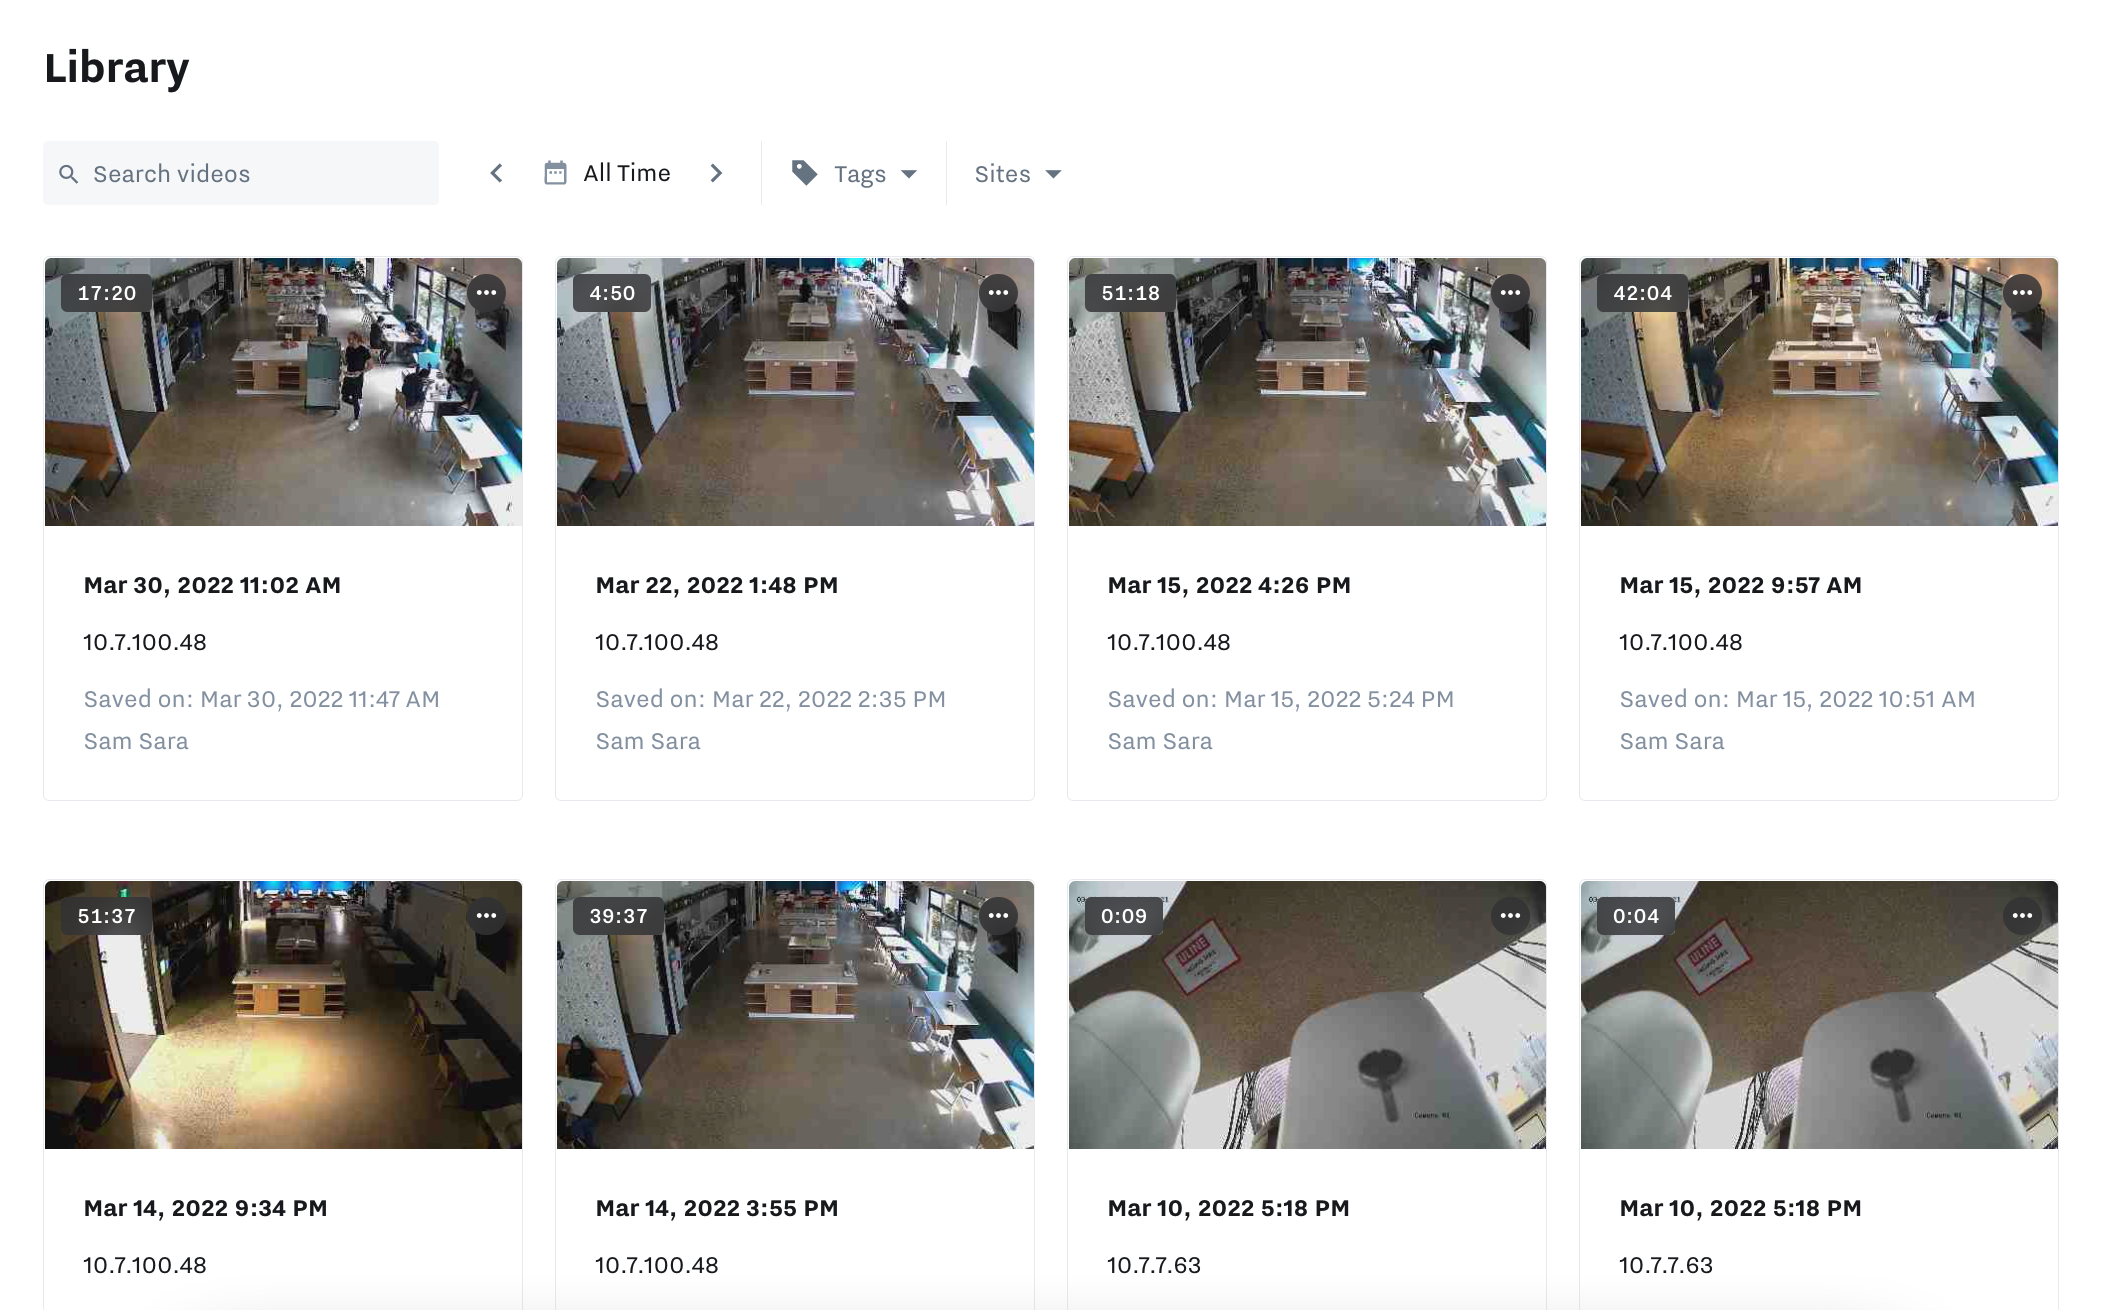
You can later view and search through all of your most important saved footage from the Samsara dashboard.
 |
-
From the Samsara dashboard, click Library.
By default, the video Library displays all saved video clips for All Time.
-
To narrow in on a specific date or time, select All Time and choose the date or date range and an optional time range within which you want to search.
-
Filter the results by one or more of the following options:
-
Tags: Filter videos by one or more tags. If you have a large number of tags, you can use the search to filter by a tag name.
For example, if one or more cameras or sites have an associated tag, you can apply it to show footage only for those cameras or sites.
-
Sites: Filter videos by one or more site locations.
-
-
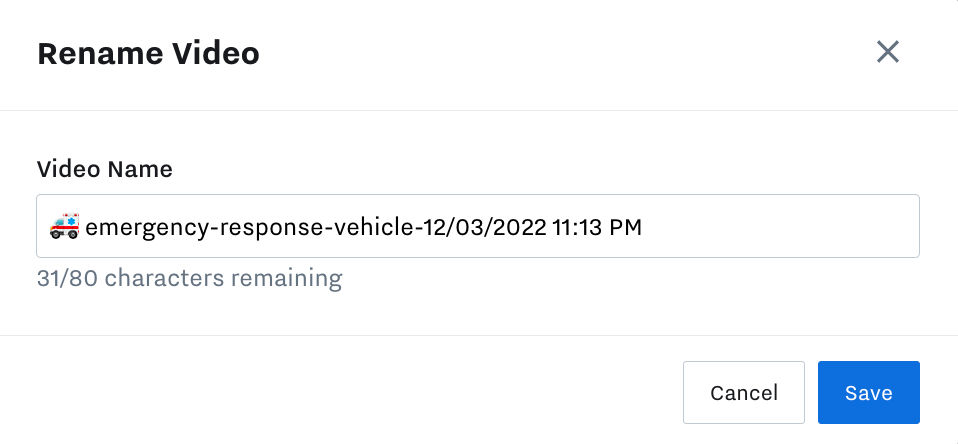
(Beta) To easily find a video, consider providing a descriptive name.
-
For the video you want to rename, click the more actions menu ( ... ) in the top right corner of the specific camera still, and then click Rename.
-
Enter a descriptive Video Name. The name can include up to 80 characters (text, numerals, or emojis).

-
Save your changes.
The name of the video clip updates to display the provided name. You can then search for videos using the new name in the Samsara dashboard. If you later download the video, the filename will also use the provided name.
-
-
Click on a camera still to review the footage.
For more information, see Examine Camera Footage.
